
Knowledge Hub / E-commerce / Uploading shows onto your website
Uploading shows onto your website
Add a new show and set up its ticket booking – whether it has one ticket price, several prices or a family ticket.
Before you start
You'll need to be logged in to your dashboard (see our login guide). Have the show's name, date, description, image and ticket prices ready.
Prefer to watch?
A short video walkthrough of this guide is on its way. In the meantime, just follow the steps below.
Video coming soon
Setting up the show
Log in to your dashboard. Not sure how? Follow our login guide.
In the dark menu on the left, click Products. You'll see a list of all the shows on your website.

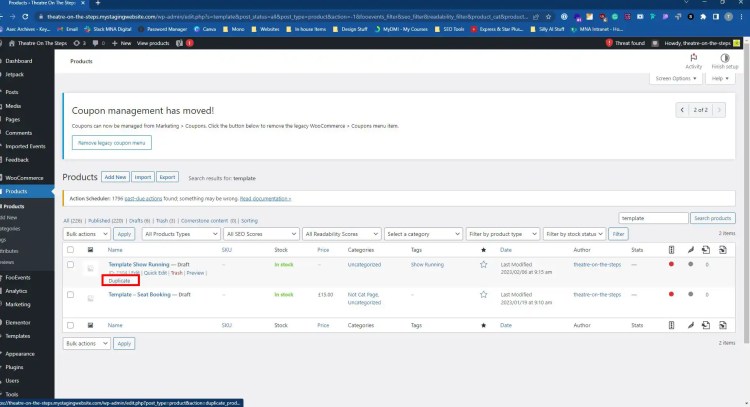
Use the search box in the top right to search for template. This shows the two template products you'll copy to set up the new show.

Hover over Template Show Running and click Duplicate. This makes a copy for you to edit.
Replace Template Show Running (Copy) with the show's name and date, replace SHOW DESCRIPTION HERE with the description, and click Set product image on the right to add the show's image.

Scroll down to Product data, click Event Settings on the left and enter the show date in Start date.

On the right, click + Add new category and add a category for the show. We recommend using the show's name, so it's easy to find later.

Scroll back to the top and click Publish.

Tickets with one price
Repeat steps 2–6, but this time duplicate Template – Seat Booking. In the categories on the right, tick the category you made for the show in step 7.

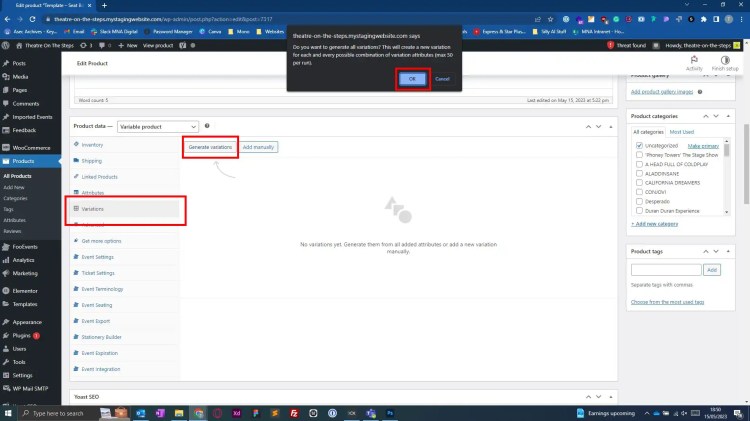
In Product data, click the Variations tab, click Generate variations, then OK on the pop-up.
Click Edit on each variation and enter the ticket price.

Scroll back to the top and click Publish. Tickets are now on sale.
Tickets with more than one price
Follow step 9 above to duplicate Template – Seat Booking and choose the show's category.
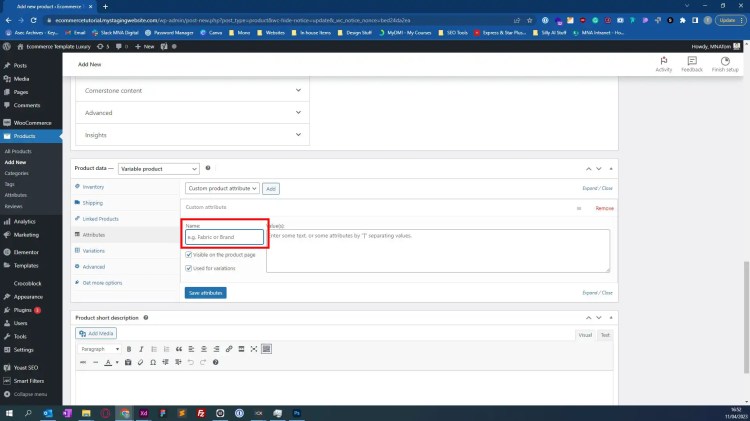
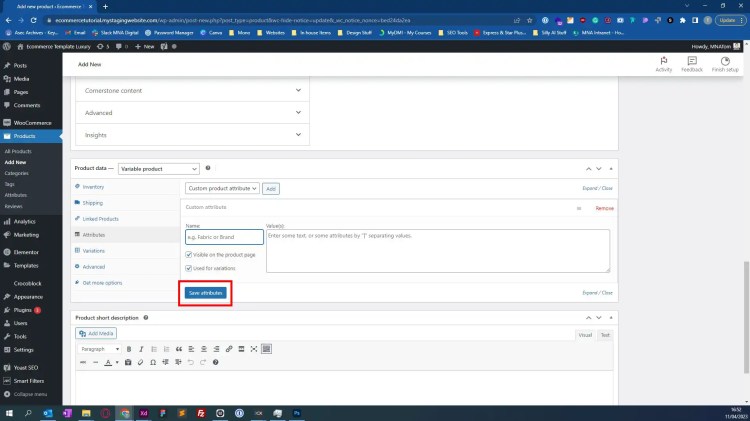
In Product data, click the Attributes tab. The Balcony and Stalls options are already there. To add another, type its name in the first box – for example Ticket type.
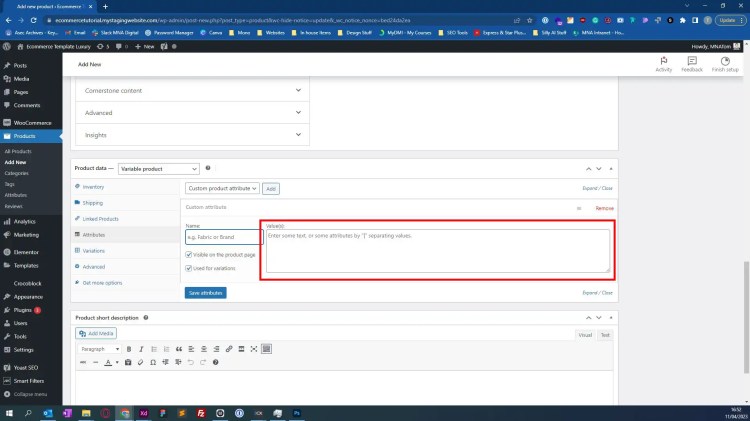
In Values, type each ticket type separated by a straight line, like Child | Adult. (The | key is usually next to Z – hold Shift and press it.)
Click Save attributes.
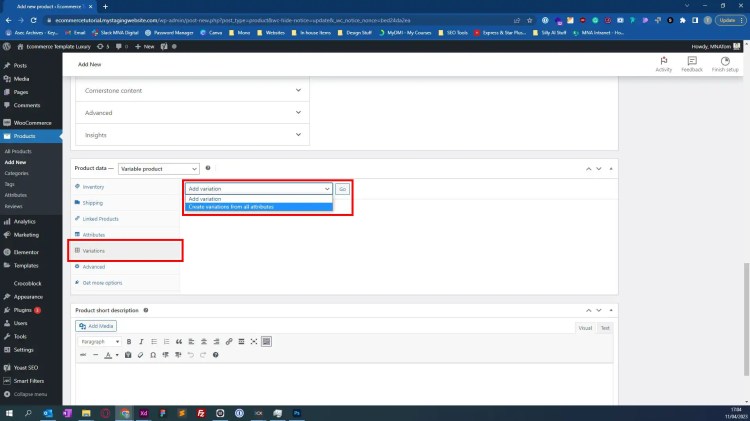
Click the Variations tab, choose Create variations from all attributes and click Go.
Click Edit on each variation and enter its Regular price. Make sure every variation has a price.
Scroll back to the top and click Publish.
Offering a family ticket?
Follow the steps for tickets with more than one price, but name the option exactly Ticket Type in step 14 and include Family Ticket in the values in step 15 – for example Child | Adult | Family Ticket. The family discount only works if both are written exactly like this, with capital letters.


